An Intro to Cherokee Purple Tomatoes
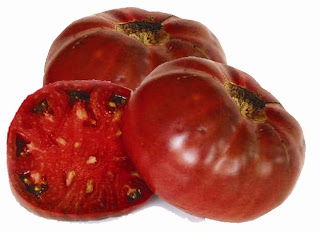
MY STATUS: UnsuccessfulCherokee Purple are a variety of indeterminate beefsteak tomato, producing large round fruit with a deep purple or black coloration. Supposedly, the cultivar originated with the Cherokee tribe and were commercialized in the 1990s. They're a perfect tomato for eating raw in salads, on sandwiches, or just on their own with a rich flavor and lots of juice. Plants take 80-90 days to mature and fruit can be as large as 12 ounces. I used seeds purchased at Home Depot in Southern California in early winter. They were kept in the fridge for about 4 months.
SUN, SUN, SUN
I feel like I've said this a lot: successful tomatoes depend on lots and lots of sun. The plants may survive in shade, but they will not produce fruit. Now that I have a clear-plastic garden shelter on our roof, my plants will get as much sun as possible.
RAIN PROTECTION
Another statement I've repeated a lot: Keep the tomatoes out of the rain. Depending on how hot and sunny it is, they may need water two or three times a week. More than that and they will develop fungal and/or bacterial infections, rot or drown. Use the four-inch soil test to determine when to water: if the soil is moist at a depth of four inches, do not water.
BUGS
After bacterial and fungal infections, pests are the next biggest threat. Many varieties of worms, beetles, mites, aphids, and whiteflies consider tomato plants scrumptious. As soon as I get a complete verified list of the pests found on Pohnpei, I'll post it on this blog. Hornworms, which are notorious for ravaging tomatoes elsewhere, don't live here. Whiteflies are the most common tomato pest on Pohnpei. So far I haven't found any complete protection. View the whiteflies post for more information.
CROSS-POLLINATION ALERT
If you're growing multiple types of tomatoes at the same time and in close proximity, they can cross-pollinate. This won't affect the current generation of plants in any way, but if you plan to gather seeds from your plants for a second generation, you could end up with some strange unintended hybrids.
CONTAINERS?
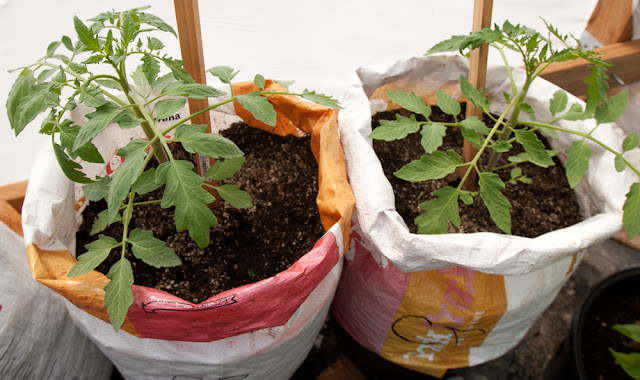
A while back I pulled up one of my tomato plants and found that its roots had pretty well filled the 6 gallon pot it was growing in. This is not a good thing. Once a plant has no more room for its roots to expand, it stops growing and won't set any more fruit. This time I'm growing my tomatoes in massive pig feed bags with about 3x the volume of the original containers.
What I Did
DAY 1 - SOWING
I planted my seeds in small biodegradable starter pots filled with store-bought garden soil--three 1/2 inch holes and a few seeds in the bottom of each. I covered the seeds, watered the soil, and put the pot in direct sun.DAY 55 - TRANSPLANTATION
I've been occupied with other things these last couple of months and haven't doted on the plants as much as before, so these guys were long over-due for transplant. If I remember right, my first batch were ready to transplant in 2-3 weeks. This pair of plants spent more than twice as long in their starter pots.I was also trying to figure out how to build a roof-top structure that I could keep my plants (and especially my tomatoes) in, so that they'd get the maximum sun Pohnpei has to offer without being exposed to the rain and wind. I had a couple of failed experiments, but finally got a really nice "house" together that keeps things dry, will stand up to the strongest winds, and gets sun from the top and all sides all day long (provided there is sun at all).
Another thing I wanted to do was adjust my growing strategy for the tomatoes, since the first run failed, in part, because the plants didn't have enough room to expand their root systems. Rather than spend a bunch of money on huge containers, I collected discarded pig feed bags from people around where we live. Every local on Pohnpei has a large supply of these empty feed bags, because everyone grows pigs. The bags are huge, super heavy duty (rip-proof), and are self-supporting when filled with soil. But since I already had 6 gallon pots from the first tomato attempt, I cut the bottoms of my bags off and set them in those pots, then added my gravel layer and soil. This makes them easier to move, when necessary. Each bag took 2 1/2 bags of potting soil, and though they are not much wider than the pots are, they are triple the depth. That will give each plant 3X the vertical room to grow. Once I got some of the sack-containers ready, I did the transplants in the manner described HERE.
DAY 62

The transplants have doubled in size in the last week. Another nice thing is that I haven't found a single whitefly. I'm not sure what to attribute this absence to yet, but I'm super happy about it. I started growing marigolds a couple of months back and have a huge container that is currently flowering. I chose to grow them specifically because of their reputation for repelling insects and hoped they would similarly affect the whiteflies.


.jpg)


0 comments:
Post a Comment