Sweet Basil

Sweet Basil has been hugely successful on Pohnpei, producing 3 cups of leaves about every four days.

Cherry Tomatoes

Trying to grow tomatoes on Pohnpei has been a struggle, but I'm making progress.

Common Herbs

Most of the traditional herbs, including parsley and oregano, have grown like weeds.

Lettuce

I've recently branched out into lettuce-growing and found unexpected success.

Lavender

A plant that has truly surprised me is lavender, which is notoriously difficult to propagate from seed.

Cilantro

Though unhappy with Pohnpei's hot weather, I was able to grow cilantro with care and whip up some nice batches of fresh salsa.

Pesto Pizza

One of the benefits of having so much basil is trying new recipes, like this delicious pesto pizza.

Mint

I was lucky enough to propagate two types of mint from cuttings, though I had no success growing the plant from seed.

Thursday, May 30, 2013

Cherokee Purple Tomatoes

An Intro to Cherokee Purple Tomatoes

Cherokee Purple Tomatoes
MY STATUS: Unsuccessful

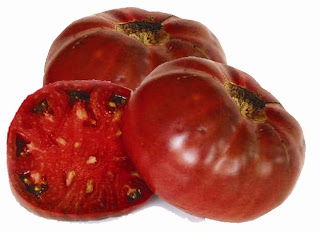
Cherokee Purple are a variety of indeterminate beefsteak tomato, producing large round fruit with a deep purple or black coloration. Supposedly, the cultivar originated with the Cherokee tribe and were commercialized in the 1990s.  They're a perfect tomato for eating raw in salads, on sandwiches, or just on their own with a rich flavor and lots of juice. Plants take 80-90 days to mature and fruit can be as large as 12 ounces. I used seeds purchased at Home Depot in Southern California in early winter. They were kept in the fridge for about 4 months.

SUN, SUN, SUN

I feel like I've said this a lot: successful tomatoes depend on lots and lots of sun. The plants may survive in shade, but they will not produce fruit. Now that I have a clear-plastic garden shelter on our roof, my plants will get as much sun as possible.

RAIN PROTECTION

Another statement I've repeated a lot: Keep the tomatoes out of the rain. Depending on how hot and sunny it is, they may need water two or three times a week. More than that and they will develop fungal and/or bacterial infections, rot or drown. Use the four-inch soil test to determine when to water: if the soil is moist at a depth of four inches, do not water.

BUGS

After bacterial and fungal infections, pests are the next biggest threat. Many varieties of worms, beetles, mites, aphids, and whiteflies consider tomato plants scrumptious. As soon as I get a complete verified list of the pests found on Pohnpei, I'll post it on this blog. Hornworms, which are notorious for ravaging tomatoes elsewhere, don't live here. Whiteflies are the most common tomato pest on Pohnpei. So far I haven't found any complete protection. View the whiteflies post for more information.

CROSS-POLLINATION ALERT

If you're growing multiple types of tomatoes at the same time and in close proximity, they can cross-pollinate. This won't affect the current generation of plants in any way, but if you plan to gather seeds from your plants for a second generation, you could end up with some strange unintended hybrids.

CONTAINERS?

A while back I pulled up one of my tomato plants and found that its roots had pretty well filled the 6 gallon pot it was growing in. This is not a good thing. Once a plant has no more room for its roots to expand, it stops growing and won't set any more fruit. This time I'm growing my tomatoes in massive pig feed bags with about 3x the volume of the original containers.

What I Did

DAY 1 - SOWING

I planted my seeds in small biodegradable starter pots filled with store-bought garden soil--three 1/2 inch holes and a few seeds in the bottom of each. I covered the seeds, watered the soil, and put the pot in direct sun.

DAY 55 - TRANSPLANTATION

My roof-top garden shelter
I've been occupied with other things these last couple of months and haven't doted on the plants as much as before, so these guys were long over-due for transplant. If I remember right, my first batch were ready to transplant in 2-3 weeks. This pair of plants spent more than twice as long in their starter pots.

I was also trying to figure out how to build a roof-top structure that I could keep my plants (and especially my tomatoes) in, so that they'd get the maximum sun Pohnpei has to offer without being exposed to the rain and wind. I had a couple of failed experiments, but finally got a really nice "house" together that keeps things dry, will stand up to the strongest winds, and gets sun from the top and all sides all day long (provided there is sun at all).

Cherokee Purple plants (right two bags) a couple of days after transplantation

Another thing I wanted to do was adjust my growing strategy for the tomatoes, since the first run failed, in part, because the plants didn't have enough room to expand their root systems. Rather than spend a bunch of money on huge containers, I collected discarded pig feed bags from people around where we live. Every local on Pohnpei has a large supply of these empty feed bags, because everyone grows pigs. The bags are huge, super heavy duty (rip-proof), and are self-supporting when filled with soil. But since I already had 6 gallon pots from the first tomato attempt, I cut the bottoms of my bags off and set them in those pots, then added my gravel layer and soil. This makes them easier to move, when necessary. Each bag took 2 1/2 bags of potting soil, and though they are not much wider than the pots are, they are triple the depth. That will give each plant 3X the vertical room to grow.  Once I got some of the sack-containers ready, I did the transplants in the manner described HERE.

DAY 62
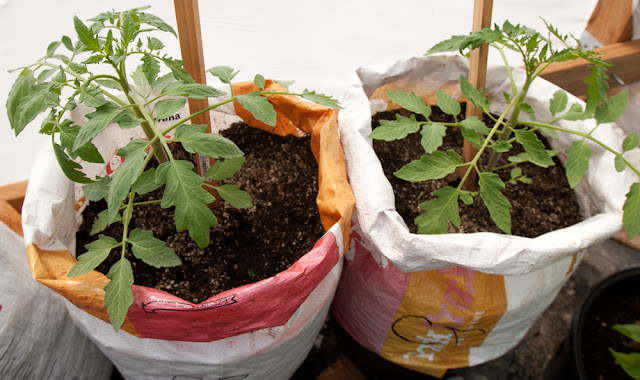
64-day-old Cherokee Purple tomato plants

The transplants have doubled in size in the last week. Another nice thing is that I haven't found a single whitefly. I'm not sure what to attribute this absence to yet, but I'm super happy about it. I started growing marigolds a couple of months back and have a huge container that is currently flowering. I chose to grow them specifically because of their reputation for repelling insects and hoped they would similarly affect the whiteflies.

DAY 77 - TOMATO YELLOW LEAF CURL VIRUS & TERMINATION

Yellow Leaf Curl Virus on Cherokee Purple tomato plant
Over the past few days, both Cherokee Purples have began to show signs of Tomato Yellow Leaf Curl Virus, a fatal disease transmitted by whiteflies. Since no whiteflies have been observed since way back when the plants were tiny seedlings, I can only suppose that they were infected at that point and the disease takes a while to make itself apparent. Symptoms include curling, discolored, yellowish leaves with dark veins on the underside and deformation of the main stem--skinny at the bottom near the soil and about 3 to 4 times as thick near the top. Furthermore, growth has been severely retarded since the plants began to display symptoms. I'm not sure if the virus can be transmitted via physical contact with other plants, but to be safe, I am going to pull up these plants and destroy them. :(

Supersweet 100VF Hybrid Cherry Tomatoes

An Intro to Supersweet 100VF Hybrid Cherry Tomatoes

MY STATUS: Grown Successfully to Harvest  

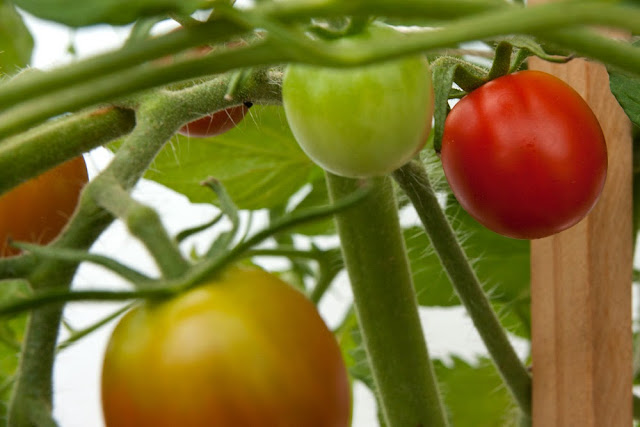
Supersweet 100VF Hybrid Cherry Tomatoes Supersweet 100VF Hybrid are a type of round cherry tomato with a resistance to verticillium and fusarium wilt.  Like all the tomato varieties I've tried to grow here, they are indeterminate, meaning that plants will continue to produce fruit as long as the weather is sufficiently warm--a good choice for Pohnpei's endless summer temperatures. Plants can grow to a height of 4 feet and take 80-90 days to mature. Fruit are small, but cherry tomato plants tend to be more prolific than large varieties. I used Ferry-Morse Start Smart seeds purchased at Home Depot in Southern California in early winter. They were kept in the fridge for about 4 months.
SUN, SUN, SUN

I feel like I've said this a lot: successful tomatoes depend on lots and lots of sun. The plants may survive in shade, but they will not produce fruit. One thing I'm still trying to figure out is how to get my tomatoes out in the open where they can get maximum sun and still be protected from rain and wind. Right now they get about 3 hours of direct sun in the afternoon (on a sunny day), which is just not enough. I tried building a PVC structure, but that didn't stand up to the crazy gusts of wind we get here. Now I'm thinking about something constructed of metal or wood.

RAIN PROTECTION

My roof-top garden shelter
Another statement I've repeated a lot: Keep the tomatoes out of the rain. Depending on how hot and sunny it is, they may need water two or three times a week. More than that and they will develop fungal and/or bacterial infections, rot or drown. Use the four-inch soil test to determine when to water: if the soil is moist at a depth of four inches, do not water.

BUGS

After bacterial and fungal infections, pests are the next biggest threat. Many varieties of worms, beetles, mites, aphids, and whiteflies consider tomato plants scrumptious. As soon as I get a complete verified list of the pests found on Pohnpei, I'll post it on this blog. Hornworms, which are notorious for ravaging tomatoes elsewhere, don't live here. Whiteflies are the most common tomato pest on Pohnpei. So far I haven't found any complete protection. View the whiteflies post for more information.

CROSS-POLLINATION ALERT

Ferry-Morse Supersweet 100VF seeds If you're growing multiple types of tomatoes at the same time and in close proximity, they can cross-pollinate. This won't affect the current generation of plants in any way, but if you plan to gather seeds from your plants for a second generation, you could end up with some strange unintended hybrids.
CONTAINERS?

A while back I pulled up one of my tomato plants and found that its roots had pretty well filled the 6 gallon pot it was growing in. This is not a good thing. Once a plant has no more room for its roots to expand, it stops growing. I will probably try larger pots this time around.

What I Did

DAY 1 - SOWING

I planted my seeds in small biodegradable starter pots filled with store-bought garden soil--three 1/2 inch holes and a few seeds in the bottom of each. I covered the seeds, watered the soil, and put the pot in direct sun. Seedlings were thinned a few days after germination to the three most robust plants. They were later thinned down to the two best plants.

DAY 62 - TRANSPLANTATION

Being busy and not playing much attention to these plants, they grew slowly and were quite overlarge by the time I got all the conditions in place for a transplant. Sixty days is a heck of a long time for tomatoes to be in starter pots, but that's okay. The garden can't be priority number one all the time.

I was also building a roof-top structure that I could keep my plants (and especially my tomatoes) in, so that they'd get the maximum sun Pohnpei has to offer without being exposed to the rain and wind. the "house" is pretty sweet and has done wonders for all the other plants. I'm crossing my fingers about the tomatoes.

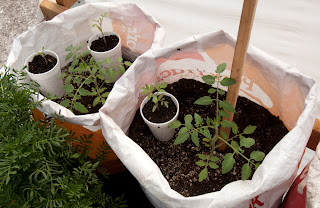
Supersweet 100VF a few days after transplantation


Another thing I wanted to do was adjust my growing strategy for the tomatoes, since the first run failed, in part, because the plants didn't have enough room to expand their root systems. Rather than spend a bunch of money on huge containers, I collected discarded pig feed bags from people around where we live. Every local on Pohnpei has a large supply of these empty feed bags, because everyone grows pigs. The bags are huge, super heavy duty (rip-proof), and are self-supporting when filled with soil. But since I already had 6 gallon pots from the first tomato attempt, I cut the bottoms of my bags off and set them in those pots, then added my gravel layer and soil. This makes them easier to move, when necessary. Each bag took 2 1/2 bags of potting soil, and though they are not much wider than the pots are, they are triple the depth. That will give each plant 3X the vertical room to grow.  Once I got some of the sack-containers ready, I did the transplants in the manner described HERE.

So far no whiteflies! If it's the marigolds, more power to them!!

DAY 64

Flowers on Super Sweet 100VF plants
The plants are loving the room, the sun, everything. Growth has been very fast. Leaves are lush and the plants look great. Even better--still no whiteflies. Not one. :)

DAY 70 - FLOWERS

Several clusters of flowers have developed and are in full bloom. I've started shaking the plants a few times a day to encourage pollination.

DAY 85 - DEVELOPING TOMATOES

Tomatoes on Super Sweet 100VF plants 85 days after sowing
I'm pretty shocked by how different these plants are from my first attempt at tomatoes. The growth has been incredibly fast. The entire summer of sunny days has certainly made a difference (even if we paid for it by baking every day). The garden shelter is a huge success. The tomatoes love it. So is the decision to plant in pig feed bags. Whiteflies continue to be absent and there have been no signs of diseases. Plants are nearing the roof, and I'll have to start training them out the side for more room. There are roughly fifty developing tomatoes on one of the plants and slightly less on the other. I've never seen so many flowers on a single tomato plant before.

Tomatoes on Super Sweet 100VF plants 85 days after sowing

DAY 107 - LOOKING GOOD

I'm on the doorstep of a harvest here. These plants have been quite amazing. They are LOADED with fruit and continue to flower like crazy. I've had to tie up many of the branches, because the weight of all the tomatoes was causing them to break. There are few fruit that are ready now, but I'd say a day or two more and I'll pick a nice batch.

Supersweet 100VF Hybrid Cherry Tomatoes on Day 107

Supersweet 100VF Hybrid Cherry Tomatoes on Day 107

DAY 110 - FIRST HARVEST


Supersweet 100VF Hybrid Cherry Tomatoes on Day 110
Today I picked my first fruit. They varied in size as you can see from the picture. All were sweet and delicious -- absolutely perfect. Another few days and I'll get a real harvest.

DAY 114 - ROLLING ALONG

Supersweet 100VF Hybrid Cherry Tomatoes on Day 114
I'm harvesting now a little bit almost every day. A few fruit here and few there. The BIG ONE is still ahead. The plants continue to put out flowers and fruit all over the place. It's actually crazy how many fruit appear on each branch. The twice daily blossom shaking must be doing the trick. I'm sure the unseasonably dry weather is helping, too.

DAY 128 - EVEN BETTER

Things continue to pick up every day.

DAY 140 - MASSIVE SUCCESS

My plants have now reached their peak and I'm getting around 30-50 sweet, delicious tomatoes per week from each plant. They're fantastic! I suppose they can't go on like this forever. I'd expect that things will start to slow down relatively soon, so 3 months is probably about the longest you can string plants like this out in Pohnpei's climate.

DAY 180 - DONE

It's been just over two solid months of fruit and now things have dropped off as I predicted. There are still some ripening fruit, but I don't see any new flowers and the main stem is becoming woody -- all signs that these plants have run their course.

Petite Marigolds

An Intro to Marigolds

MY STATUS: Grown Successfully to Harvest  

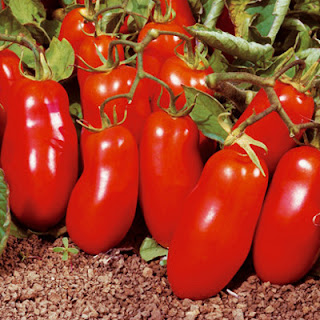
San Marzano are a type of plum tomato with an elongated body and firm flesh used primarily for making tomato paste for sauces.  They're similar to Roma tomatoes but are said to have a stronger, sweeter taste. Because they aren't as tender or juicy as the large beefsteak tomatoes, they aren't as desirable for salads and sandwiches. Like all the tomato varieties I've tried to grow here, they are indeterminate, meaning that plants will continue to produce fruit as long as the weather is sufficiently warm--a good choice for Pohnpei's endless summer temperatures. Plants can grow to a height of 6 feet and take 80-90 days to mature. Fruit are about 4 ounces. I used Martha Stewart Living seeds purchased at Home Depot in Southern California in early winter. They were kept in the fridge for about 4 months.

SUN, SUN, SUN

I feel like I've said this a lot: successful tomatoes depend on lots and lots of sun. The plants may survive in shade, but they will not produce fruit. One thing I'm still trying to figure out is how to get my tomatoes out in the open where they can get maximum sun and still be protected from rain and wind. Right now they get about 3 hours of direct sun in the afternoon (on a sunny day), which is just not enough. I tried building a PVC structure, but that didn't stand up to the crazy gusts of wind we get here. Now I'm thinking about something constructed of metal or wood.

RAIN PROTECTION

Another statement I've repeated a lot: Keep the tomatoes out of the rain. Depending on how hot and sunny it is, they may need water two or three times a week. More than that and they will develop fungal and/or bacterial infections, rot or drown. Use the four-inch soil test to determine when to water: if the soil is moist at a depth of four inches, do not water.

PESTS AWAY

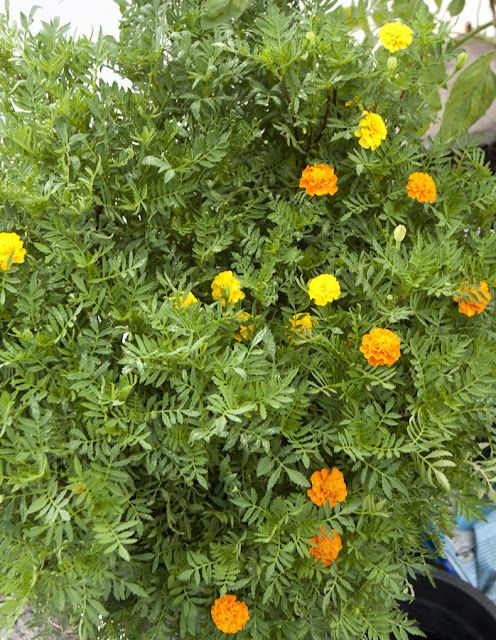
Marigolds are famous for repelling pests. They have a strong smell that many types of bugs can't stand. The question is whether they will have any effect on my primary enemy: the Pohnpeian whitefly.

What I Did

DAY 1 - SOWING

I scattered my seeds all around the main stems of my tomato plants, threw a thin layer of soil over them, and watered.

DAY 60 - BUSHY PLANTS BUT NO FLOWERS

Not sure what the problem is. The plants look good, so why aren't flowers developing?

 60-day-old marigolds

DAY 97 - FULL BLOOM (9/5)

97-day-old blooming marigolds
I don't know why, but these flowers took a long time to get started. Plants grew quickly, but 6 weeks ago, there wasn't more than one or two flowers. The plants were big and bushy, but nothing. Everything changed when I fertilized. I'm used to growing herbs that don't need a lot of soil enhancement, but the marigolds were certainly waiting for it. One dose of chicken manure and they pepped up. Buds developed all over the place and have recently opened. One thing I've noticed, though is how flimsy and tall the stems are. I ended tying a piece of twine around the whole bunch to keep them together otherwise plants around the edges would start to bend over.

I haven't done any scientific trials to see if the marigolds are really the cause of the whitefly-free garden, but it seems like a possibility. They're definitely nice looking. :)

97-day-old blooming marigolds

San Marzano Tomatoes

An Intro to San Marzano Tomatoes

MY STATUS: Grown Successfully to Harvest  

San Marzano Tomatoes
San Marzano are a type of plum tomato with an elongated body and firm flesh used primarily for making tomato paste for sauces.  They're similar to Roma tomatoes but are said to have a stronger, sweeter taste. Because they aren't as tender or juicy as the large beefsteak tomatoes, they aren't as desirable for salads and sandwiches. Like all the tomato varieties I've tried to grow here, they are indeterminate, meaning that plants will continue to produce fruit as long as the weather is sufficiently warm--a good choice for Pohnpei's endless summer temperatures. Plants can grow to a height of 6 feet and take 80-90 days to mature. Fruit are about 4 ounces. I used Martha Stewart Living seeds purchased at Home Depot in Southern California in early winter. They were kept in the fridge for about 4 months.

SUN, SUN, SUN

I feel like I've said this a lot: successful tomatoes depend on lots and lots of sun. The plants may survive in shade, but they will not produce fruit. One thing I'm still trying to figure out is how to get my tomatoes out in the open where they can get maximum sun and still be protected from rain and wind. Right now they get about 3 hours of direct sun in the afternoon (on a sunny day), which is just not enough. I tried building a PVC structure, but that didn't stand up to the crazy gusts of wind we get here. Now I'm thinking about something constructed of metal or wood.

RAIN PROTECTION

Another statement I've repeated a lot: Keep the tomatoes out of the rain. Depending on how hot and sunny it is, they may need water two or three times a week. More than that and they will develop fungal and/or bacterial infections, rot or drown. Use the four-inch soil test to determine when to water: if the soil is moist at a depth of four inches, do not water.

BUGS

After bacterial and fungal infections, pests are the next biggest threat. Many varieties of worms, beetles, mites, aphids, and whiteflies consider tomato plants scrumptious. As soon as I get a complete verified list of the pests found on Pohnpei, I'll post it on this blog. Hornworms, which are notorious for ravaging tomatoes elsewhere, don't live here. Whiteflies are the most common tomato pest on Pohnpei. So far I haven't found any complete protection. View the whiteflies post for more information.

CROSS-POLLINATION ALERT

If you're growing multiple types of tomatoes at the same time and in close proximity, they can cross-pollinate. This won't affect the current generation of plants in any way, but if you plan to gather seeds from your plants for a second generation, you could end up with some strange unintended hybrids.

CONTAINERS?

My primary worry with the San Marzanos was that the containers won't give them enough room to grow, but with the pig feed bag method, things should be excellent.

What I Did

DAY 1 - SOWING

I planted my seeds in small biodegradable starter pots filled with store-bought garden soil--three 1/2 inch holes and a few seeds in the bottom of each. I covered the seeds, watered the soil, and put the pot in direct sun. A few days after germination, I thinned the seedlings to three. About a week later, I thinned them down to a single plant.

DAY 62 - TRANSPLANTATION

My roof-top garden shelter
Being busy and not playing much attention to these plants, they grew slowly and were quite overlarge by the time I got all the conditions in place for a transplant. Sixty days is a heck of a long time for tomatoes to be in starter pots, but that's okay. The garden can't be priority number one all the time.

I was also building a roof-top structure that I could keep my plants (and especially my tomatoes) in, so that they'd get the maximum sun Pohnpei has to offer without being exposed to the rain and wind. the "house" is pretty sweet and has done wonders for all the other plants. I'm crossing my fingers about the tomatoes.

Recently transplanted San Marzano tomato plant (left bag)


Another thing I wanted to do was adjust my growing strategy for the tomatoes, since the first run failed, in part, because the plants didn't have enough room to expand their root systems. Rather than spend a bunch of money on huge containers, I collected discarded pig feed bags from people around where we live. Every local on Pohnpei has a large supply of these empty feed bags, because everyone grows pigs. The bags are huge, super heavy duty (rip-proof), and are self-supporting when filled with soil. But since I already had 6 gallon pots from the first tomato attempt, I cut the bottoms of my bags off and set them in those pots, then added my gravel layer and soil. This makes them easier to move, when necessary. Each bag took 2 1/2 bags of potting soil, and though they are not much wider than the pots are, they are triple the depth. That will give each plant 3X the vertical room to grow.  Once I got some of the sack-containers ready, I did the transplants in the manner described HERE.

So far no whiteflies! If it's the marigolds, more power to them!!

DAY 64

64-day-old San Marzano plant (2 days after transplantation
Boy did these plants want to be transplanted! In the two days since I put the San Marzano in the bag, it has tripled in size. It's loving the room, the sun, everything. Even better--still no whiteflies. Not one. :)

DAY 77 - FLOWERS

Three clusters of flowers have developed and just bloomed today. I've started shaking the plants a few times a day to encourage pollination.

DAY 85 (8/22) - DEVELOPING TOMATOES

This plant is developing roughly three times as fast as the plants in my first tomato run. Certainly the garden shelter has done wonders and a long spell of sunny weather can't have hurt. I still have not observed a single whitefly on any of the five tomato plants I currently have. Leaves look lush and healthy, and the plant is already more than two feet tall. A few of the flowers have dried up and small developing tomatoes are visible. This is pretty amazing, considering I just planted the things about 20 days ago. The plant also seems to have avoided the Yellow Leaf Curl Virus that did in my two Cherokee Purples.

Developing fruit on 95-day-old San Marzano plant

Wednesday, May 15, 2013

Lolla Rosa Lettuce

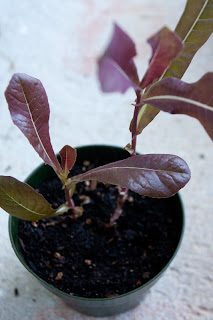
64-day-old Lolla Rosa Lettuce plant
An Intro to Lolla Rosa

MY STATUS: Grown Successfully to Harvest   

Lolla Rosa is a variety of loose-leaf lettuce with a deep maroon coloration, a slight tendency to curl, and a mild flavor. It's frequently used in gourmet salads.

SOIL

The plant likes well-drained, fertile soil and regular fertilizer.

HOW MUCH SUN?


Lolla Rosa is sensitive to heat. On Pohnpei, give it early morning sun and then keep it in open shade for the rest of the day. If the weather is too hot, the seeds might not germinate at all. Only one of my plants survived to maturity.

HOW MUCH WATER?

Keep the soil moist, not wet. Watering unevenly will make the leaves bitter. Watering too much will rot the roots.

GROWING IN CONTAINERS

I've had some success growing this plant in small to medium containers. The plant usually does not grow taller than 6 or 7 inches.

PESTS

The usual lettuce pests will attack Lolla Rosa--slugs, caterpillers, aphids, cutworms, and cabbageworms, and whiteflies. The latter is one you need to worry about on Pohnpei.

PICK OFTEN

Cutting leaves when they are small and tender is the best tactic. Young leaves are more flavorful, and the constant picking will stimulate the plant's growth.

HARVESTING

Lolla Rosa should be ready to pick about 6 weeks after germination. Individual leaves can be picked as needed.

What I Did

DAY 1 - SOWING

Mesclun seedlings
I sowed my Ferry-Morse StartSmart seeds in a shallow, rectangular container. I put a thin layer of gravel on the bottom and filled the rest with a standard mix of potting soil. Seeds were sprinkled on the surface and covered with a thin layer of soil. The container was kept in full sun until germination, after which it was moved to a shady spot. I put it in the sun early in the morning.

DAY 7 - GERMINATION

The Lolla Rosa took longer to germinate than some of the other lettuce species I'm growing, but not as long as the arugula.

DAY 12

Seedlings have increased in size and some are starting to see the development of true leaves.

DAY 19

Hot, sunny weather destroyed almost all of my seedlings. Only one survived.

DAY 49

My remaining plant gets an hour of direct sun early in the morning; I keep it in open shade the rest of the time. Today, I transplanted the young plant to its own pot. It's starting to look pretty good with nice ruddy leaves.

DAY 64 

The plant has tolerated the transplantation well and is growing much quicker now. I think  it's time to start harvesting.

DAY 107 (9/3)

Today I decided my plants have reached the end of their growth period. The hot weather has pushed them to go to seed in the last day or two, and though I've picked off the flower buds, the stems have lengthened, the leaves have darkened and become tougher, and the flavor of the leaves is getting bitter. It's been a great run--two solid months of fresh almost daily gourmet salads. I never would have expected the plants to grow here, much less be so productive and healthy. I'm considering a sowing again, but not until this hot weather subsides.

Arugula (Rocket)

64-day-old arugula plant

An Intro to Arugula

MY STATUS: Grown Successfully to Harvest   

Arugula, also called rocket, is a leafy lettuce-like plant that is native to the Mediterranean and is eaten raw in salads or used as a topping on pizza. It has a sharp, peppery flavor.

SOIL

The plant grows well in relatively dry, loose soil.

HOW MUCH SUN?


Arugula likes cooler weather than Pohnpei has to offer. It can be grown here, but because it is sensitive to heat, give it direct sun only early in the morning before the temperature rises. Keep it in open shade for the rest of the day. If the plants get too hot, they'll go to the seed and the leaves will be bitter. Or even worse--they'll just wither and die. On very hot days, it helps to mist the leaves with cold water.

HOW MUCH WATER?

Water deeply and allow the soil to nearly dry out before watering again.

GROWING IN CONTAINERS

Arugula is very container-friendly. A medium-sized pot works fine. Or you can start it out in a smaller one and transplant as necessary. Make sure it has good drainage. Leafy greens never do well with water-logging.

PESTS

Arugula has few enemies. If you're growing the plants in pots on a porch, they should be safe from slugs and caterpillers.

PICK OFTEN

Cutting leaves when they are small and tender is the best tactic. Young leaves are more flavorful, and the constant picking will stimulate the plant's growth.

FERTILIZE

Like most lettuces, arugula does best when compost or fertilizer is added on a regular basis (once a week)--especially when growing in containers. I use a fish emulsion most of the time, but high nitrogen fertilizers, like chicken or steer manure, work will with plants grown for their leaves.

HARVESTING

Arugula should be ready to pick about 2 months after germination. Individual leaves can be picked as needed. Cut them off near the base.

What I Did

DAY 1 - SOWING

Mesclun seedlings
I sowed my Ferry-Morse StartSmart seeds in a shallow, rectangular container. I put a thin layer of gravel on the bottom and filled the rest with a standard mix of potting soil. Seeds were sprinkled on the surface and covered with a thin layer of soil. The container was kept in full sun until germination, after which it was moved to a shady spot. I put it in the sun early in the morning.

DAY 8 - GERMINATION

The arugula took about three times as long to germinate as some of the other greens I sowed, probably due to its aversion to heat.

DAY 12

The seedlings have increased in size and some are starting to see the development of true leaves.

DAY 19

After a period of hot, sunny weather, many of the seedlings shriveled or wilted. I pulled those out. Those that have survived are growing very, very slowly.

DAY 49

Development has been very slow, but several plants have survived. I give them about an hour of direct sun early in the morning and keep them in open shade the rest of the time. These plants are very prone to heat-wilt. They can't handle direct Pohnpeian sun any time after about 9 AM. I transplanted the best-looking plants into their own pot. Transplant in the early evening and keep the plants in shade for a few days before gradually acclimating them to some sun.

DAY 64

64-day-old arugula
One of the things that's surprising about my plants at the moment is that the leaves have turned a reddish color! That makes me wonder if I didn't get these mixed up and mis-identified them (they were grown from a mesclun seed mix). I've never seen photos of red-hued arugula, but the shape of the leaves is spot-on. But, really, who knows? Pohnpei's heat and humidity might be doing something different. As long as the leaves taste good and the plants keep growing, I suppose I don't really care.
90-day-old arugula

DAY 90 - STILL GOING (8/22)

The arugula has grown much lower than the other greens, but that may be a good thing. It's still producing leaves happily, where some of the faster growing lettuces are looking like they are in the first stages of bolting...which means they don't have long to live. This arugula his pretty mild, but I've enjoyed it. I also like that all the plants seem to have slightly different coloration. Some are red, some green, some mixed. Beautiful.

Red Romaine Lettuce

An Intro to Red Romaine

MY STATUS: Grown Successfully to Harvest   

Red Romaine is a variety of loose-leaf lettuce that is belongs in the Romaine familyand may have come from Romania (hence the name) . It's identical to Parris Island Cos, except that the leaves are deep red or magenta instead of light green. The plant can grow to be 10 inches tall. It's a great lettuce for mixed-green salads.

SOIL

64-day-old Red Romaine plants
The plant grows well in well-drained, loamy soil.

HOW MUCH SUN?


I've found this species to be very tolerant to Pohnpei's hot, humid conditions, but even so it should not be left out in direct sun after about 9 AM. Keep it in open shade for the rest of the day.

HOW MUCH WATER?

Each plant needs about 1 inch of water a week. Keep the soil moist, but avoid waterlogging, which will rot the roots. Water at the base, not on the leaves, as the latter can encourage mold growth.

GROWING IN CONTAINERS

I've found Red Romaine to be container-friendly. It grows well in fairly small pots, too, but make sure it has good drainage.

PESTS

The usual lettuce villains threaten, but you can avoid almost all of them simply by keeping your containers on a porch away from the ground.

PICK OFTEN

Cutting leaves when they are small and tender is the best tactic. Young leaves are more flavorful, and the constant picking will stimulate the plant's growth.

FERTILIZE

Like most lettuces, Red Romaine does best when compost or fertilizer is added on a regular basis (once a week)--especially when growing in containers. I use a fish emulsion most of the time, but high nitrogen fertilizers, like chicken or steer manure, work will with plants grown for their leaves.

HARVESTING

Parris Island Cos should be ready to pick about 70 days after germination. Individual leaves can be picked as needed. Cut them off near the base.

What I Did

DAY 1 - SOWING

Mesclun seedlings
I sowed my Ferry-Morse StartSmart seeds in a shallow, rectangular container. I put a thin layer of gravel on the bottom and filled the rest with a standard mix of potting soil. The container is being kept in full sun until germination, after which it will be moved to the shade.

DAY 3 - GERMINATION

The Red Romaine has been the third fastest germinating of the varieties in my mesclun mix. Just over 48 hours. Once germinated, the container was moved to open shade, as these plants prefer cooler weather.

DAY 12

Seedlings have increased in size and some are starting to see the development of true leaves.

DAY 19

A several-day stretch of hot, sunny weather wiped out a lot of my seedlings but the strongest have survived.

DAY 49

Development has been very slow, but the plants are making it. They get about an hour of direct sun early in the morning and stay in open shade the rest of the time.

DAY 64

90-day-old Red Romaine
The best-looking Red Romaine plants in my original container were transplanted into their own small pots and are thriving. I think they are about ready to harvest.

DAY 90

I've been really enjoying this lettuce. Nice flavor, crisp leaves, beautiful color. We've been having nice mixed salads regularly. These plants may be nearing the end of their life cycle, however. One symptom of picking leaves from the bottom is that it has encouraged the plants to grow taller and taller. They have long stems now. They're still producing leaves, but slower than before. I'm guessing they'll bolt fairly soon.

DAY 107 (9/3) - END OF RUN

Today I decided my lettuces have reached the end of their growth period. The hot weather has pushed them to go to seed in the last day or two, and though I've picked off the flower buds, the stems have lengthened, the leaves have darkened and become tougher, and the flavor of the leaves is getting bitter. It's been a great run--two solid months of fresh almost daily gourmet salads. I never would have expected the plants to grow here, much less be so productive and healthy. I'm considering sowing again, but not until this hot weather subsides.

Parris Island Cos Lettuce

An Intro to Parris Island Cos

64-day-old Parris Island Cos plants
MY STATUS: Grown Successfully to Harvest   

Parris Island Cos is a variety of loose-leaf lettuce that is belongs in the Romaine family and originated in the warm humid climate of South Caroline. It has light green elongated leaves with crunchy ribs and a slightly "spicy" flavor. The plant can grow to be 10 inches tall. It's a good type of lettuce for caesar salads.

SOIL

The plant grows well in well-drained, loamy soil.

HOW MUCH SUN?


I've found this species to be very tolerant to Pohnpei's hot, humid conditions, but even so it should not be left out in direct sun after about 9 AM. Keep it in open shade for the rest of the day.

HOW MUCH WATER?

Each plant needs about 1 inch of water a week. Keep the soil moist, but avoid waterlogging, which will rot the roots. Water at the base, not on the leaves, as the latter can encourage mold growth.

GROWING IN CONTAINERS

I've found Parris Island Cos to be container-friendly. It grows well in fairly small pots, too, but make sure it has good drainage.

PESTS

The usual lettuce villains threaten, but you can avoid almost all of them simply by keeping your containers on a porch away from the ground.

PICK OFTEN

Cutting leaves when they are small and tender is the best tactic. Young leaves are more flavorful, and the constant picking will stimulate the plant's growth.

FERTILIZE

Like most lettuces, Parris Island Cos does best when compost or fertilizer is added on a regular basis (once a week)--especially when growing in containers. I use a fish emulsion most of the time, but high nitrogen fertilizers, like chicken or steer manure, work will with plants grown for their leaves.

HARVESTING

Parris Island Cos should be ready to pick about 70 days after germination. Individual leaves can be picked as needed. Cut them off near the base.

What I Did

DAY 1 - SOWING

Mesclun seedlings
I sowed my Ferry-Morse StartSmart seeds in a shallow, rectangular container. I put a thin layer of gravel on the bottom and filled the rest with a standard mix of potting soil. The container is being kept in full sun until germination, after which it will be moved to the shade.

DAY 3 - GERMINATION

The Parris Island Cos has been the second fastest germinating of the varieties in my mesclun mix. It took about 48 hours. Once germinated, the container was moved to open shade, as these plants prefer cooler weather.

DAY 12

Seedlings have increased in size and some are starting to see the development of true leaves.

DAY 19

A several-day stretch of hot, sunny weather wiped out a lot of my seedlings but the strongest have survived.

DAY 49

Development has been very slow, but the plants are making it. They get about an hour of direct sun early in the morning and stay in open shade the rest of the time.

DAY 64

Parris Island Cos plants 64 days after sowing
The most robust Parris Island Cos plants in my original container were transplanted into their own small pots and are thriving. They are now producing the most leaves of any of my greens, even surpassing the hardy Red Russian Kale. I'll start harvesting soon.

DAY 107 (9/3) - END OF RUN

Today I decided my lettuces have reached the end of their growth period. The hot weather has pushed them to go to seed in the last day or two, and though I've picked off the flower buds, the stems have lengthened, the leaves have darkened and become tougher, and the flavor of the leaves is getting bitter. It's been a great run--two solid months of fresh almost daily gourmet salads. I never would have expected the plants to grow here, much less be so productive and healthy. I'm considering sowing again, but not until this hot weather subsides.

Sunday, May 5, 2013

What Can Happen If You Don't Stake Your Tomatoes Properly

Cherry tomato plant with broken main stem
Here's an example of the damage that can result if you don't stake your tomatoes properly or expose them to too much wind. This cherry tomato plant snapped off in the middle of the main stem, just above where the stake ended. Unfortunately, the plant was currently fruiting and had about 20 infant tomatoes on the top, so I lost a harvest.

THE LESSON

  • Stakes should be taller than the plant will ever grow. This plant outgrew the stake and I didn't bother to put in a new one.
  • Stakes should be installed as deeply as possible.
  • Two stakes are better than one.
  • The more places the stem is tied to the stake(s), the better.
  • Tomatoes shouldn't be in a place that is completely unprotected from wind (like the open roof).

IF THIS HAPPENS TO YOU

Don't give up hope. Tomato plants are able to recover quite well from this sort of injury. Though the main stem will not regrow from the breaking point, the plant will produce new branches that will take the place of the growing tip. Normally these are called suckers. They grow at the intersection of the main stem and a major branch. Usually you snip them off as soon as they appear. But, if your main stem is severed, you can let one of these suckers grow to take its place.

GRAFT & TAPE

If your stem is just broken, but not completely detached, you can tape it back in place and the two parts will eventually fuse back together just like a broken bone.

PLANT THE BROKEN BRANCH / STEM

Broken branches and large sections of stem can also be replanted. They will root in a short time and reestablish themselves. This is actually the process known as "cloning" and it can be done to create new plants rather than growing from seed.