Sweet Basil

Sweet Basil has been hugely successful on Pohnpei, producing 3 cups of leaves about every four days.

Cherry Tomatoes

Trying to grow tomatoes on Pohnpei has been a struggle, but I'm making progress.

Common Herbs

Most of the traditional herbs, including parsley and oregano, have grown like weeds.

Lettuce

I've recently branched out into lettuce-growing and found unexpected success.

Lavender

A plant that has truly surprised me is lavender, which is notoriously difficult to propagate from seed.

Cilantro

Though unhappy with Pohnpei's hot weather, I was able to grow cilantro with care and whip up some nice batches of fresh salsa.

Pesto Pizza

One of the benefits of having so much basil is trying new recipes, like this delicious pesto pizza.

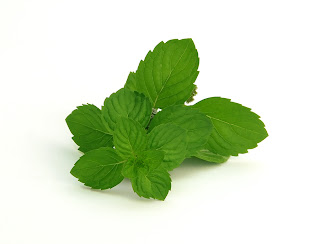
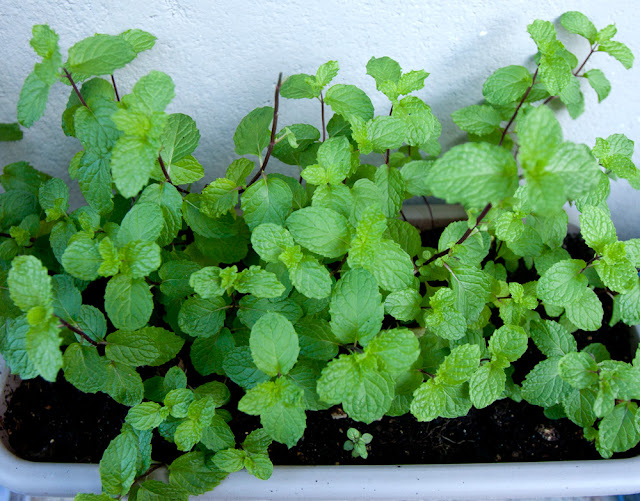
Mint

I was lucky enough to propagate two types of mint from cuttings, though I had no success growing the plant from seed.

Showing posts with label herbs. Show all posts

Wednesday, May 15, 2013

Arugula (Rocket)

64-day-old arugula plant

An Intro to Arugula

MY STATUS: Grown Successfully to Harvest   

Arugula, also called rocket, is a leafy lettuce-like plant that is native to the Mediterranean and is eaten raw in salads or used as a topping on pizza. It has a sharp, peppery flavor.

SOIL

The plant grows well in relatively dry, loose soil.

HOW MUCH SUN?


Arugula likes cooler weather than Pohnpei has to offer. It can be grown here, but because it is sensitive to heat, give it direct sun only early in the morning before the temperature rises. Keep it in open shade for the rest of the day. If the plants get too hot, they'll go to the seed and the leaves will be bitter. Or even worse--they'll just wither and die. On very hot days, it helps to mist the leaves with cold water.

HOW MUCH WATER?

Water deeply and allow the soil to nearly dry out before watering again.

GROWING IN CONTAINERS

Arugula is very container-friendly. A medium-sized pot works fine. Or you can start it out in a smaller one and transplant as necessary. Make sure it has good drainage. Leafy greens never do well with water-logging.

PESTS

Arugula has few enemies. If you're growing the plants in pots on a porch, they should be safe from slugs and caterpillers.

PICK OFTEN

Cutting leaves when they are small and tender is the best tactic. Young leaves are more flavorful, and the constant picking will stimulate the plant's growth.

FERTILIZE

Like most lettuces, arugula does best when compost or fertilizer is added on a regular basis (once a week)--especially when growing in containers. I use a fish emulsion most of the time, but high nitrogen fertilizers, like chicken or steer manure, work will with plants grown for their leaves.

HARVESTING

Arugula should be ready to pick about 2 months after germination. Individual leaves can be picked as needed. Cut them off near the base.

What I Did

DAY 1 - SOWING

Mesclun seedlings
I sowed my Ferry-Morse StartSmart seeds in a shallow, rectangular container. I put a thin layer of gravel on the bottom and filled the rest with a standard mix of potting soil. Seeds were sprinkled on the surface and covered with a thin layer of soil. The container was kept in full sun until germination, after which it was moved to a shady spot. I put it in the sun early in the morning.

DAY 8 - GERMINATION

The arugula took about three times as long to germinate as some of the other greens I sowed, probably due to its aversion to heat.

DAY 12

The seedlings have increased in size and some are starting to see the development of true leaves.

DAY 19

After a period of hot, sunny weather, many of the seedlings shriveled or wilted. I pulled those out. Those that have survived are growing very, very slowly.

DAY 49

Development has been very slow, but several plants have survived. I give them about an hour of direct sun early in the morning and keep them in open shade the rest of the time. These plants are very prone to heat-wilt. They can't handle direct Pohnpeian sun any time after about 9 AM. I transplanted the best-looking plants into their own pot. Transplant in the early evening and keep the plants in shade for a few days before gradually acclimating them to some sun.

DAY 64

64-day-old arugula
One of the things that's surprising about my plants at the moment is that the leaves have turned a reddish color! That makes me wonder if I didn't get these mixed up and mis-identified them (they were grown from a mesclun seed mix). I've never seen photos of red-hued arugula, but the shape of the leaves is spot-on. But, really, who knows? Pohnpei's heat and humidity might be doing something different. As long as the leaves taste good and the plants keep growing, I suppose I don't really care.
90-day-old arugula

DAY 90 - STILL GOING (8/22)

The arugula has grown much lower than the other greens, but that may be a good thing. It's still producing leaves happily, where some of the faster growing lettuces are looking like they are in the first stages of bolting...which means they don't have long to live. This arugula his pretty mild, but I've enjoyed it. I also like that all the plants seem to have slightly different coloration. Some are red, some green, some mixed. Beautiful.

Saturday, April 6, 2013

Florence Fennel

An Intro to Fennel

MY STATUS: Grown Successfully to Harvest   

Fennel is a perennial umbelliferous herb that can grow quite tall and has fine feathery leaves and a strong smell. The pale bulb-like stem is often eaten as a vegetable, the leaves are used in salads, and the licorice-flavored seeds are eaten particularly in Middle Eastern and South Asian cultures.

SOIL REQUIREMENTS

Fennel likes loose well-drained soil.

SUN

Fennel is said to like full sun in temperate climes, but we'll see if it can handle direct sun on Pohnpei.

CROSS-POLLINATION ALERT

Fennel, dill, and members of the coriander family will cross-pollinate if grown nearby each other, ruining the taste of all the plants involved. Fennel can also have some allelopathic affects on other plants, inhibiting their growth. Fennel should be kept well away from all other plants and especially from cilantro, culantro, dill, and caraway.

CONTAINER ISSUES

Fennel isn't really well-suited to containers because it grows such a large deep root, but reportedly you can grow it successfully if your pots are large enough (5 gallon). If you plant it in something smaller or too close together, the edible bulb-stem doesn't develop properly . . . though you can still harvest it for seeds.

PESTS

Fennel doesn't usually have pest problems. Whiteflies will go after it, but not usually to a degree that the plant will be harmed.

What I Did

DAY 1 - SOWING

Fennel seedlings 2 days after germinationNothing particularly special to report here. I prepared a pot with some gravel on the bottom and potting soil, watered it, planted a pinch of seeds in several 1/4-inch deep holes, and covered them over. Fennel is reportedly averse to transplantation; it was widely suggested that seeding happen in the plant's final destination. Although it is not recommended that you try to grow fennel in a container at all, that's what I have to work with and since I didn't have a huge container on-hand, I may try transplanting it once the seedlings are established. Double no-no. We'll see what happens. I used Ferry-Morse StartSmart seeds purchased at Home Depot in Southern California. They were refrigerated for about 3 months prior to sowing.

DAY 7 - GERMINATION

The first seedlings are beginning to poke up through the soil. They look very similar to cilantro seedlings and identical to dill.

DAY 16

9-day-old fennel seedlings
I thinned out my seedlings to about five or six, which will be transplanted later. All the seedlings are now about 2-3 inches tall and have their first feathery true leaves. Leaves resembled dill at first, but then they started to look a little different. This plant loves being in the sun all day.

DAY 23

Seedlings are about 3 1/2 inches tall now and are developing their second true leaves.

DAY 36

Four of the seedlings were transplanted a few days ago and have recovered nicely. The plants so far have not seemed to be as hardy in full sun as the dill, but they are still quite tough. I give them a little shade in the hottest part of the day.

Fennel 36 days after sowing

DAY 44 - MASSIVE GROWTH


Fennel stem 1 1/2 months after sowing
So far, I think fennel has been the second easiest plant to maintain after rosemary. I really haven't paid much attention to my two pots. They are kept on a side porch far from all my other plants (on purpose), where they get a lot of direct sun and are also slapped with quite a lot of rain. These are the least protected of any plants I've tried to grow, but they don't seem to have been adversely affected. They are huge--all four plants! They smell wonderfully of licorice. The stems have thickened up nicely (right), so they are quite stable despite their height. But, really . . . when you look at what these plants were like 8 days ago, it's shocking. They've increased in height by a factor of five in just over a week.

DAY 59 - FLOWERING

Flowers on 59-day-old fennel plant
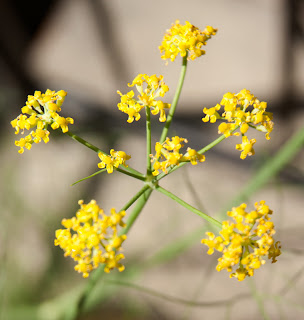
I grew plants in two different containers, in hopes that one set would develop bulbs, while the other would go to seed. Both the seeds and bulb are edible, but you can't get them from the same plant. Sure enough, the plants in the smaller container have begun to flower (as they don't have enough room to grow the bulb). The plants in the larger container were developing nice little bulbs, but the container wasn't large enough to really get the best out of the plants and I was afraid they would go to seed, too, (in which case the bulb becomes bitter), so I harvested the largest one and grilled up. It had a strong but pleasant licorice flavor and an artichoke-like texture. There are now yellow flowers all over the smaller plants. Once the flowers dry up, I'll harvest the seeds. For my second run of this plant, I think I'll try a larger container.

Buried fennel bulb 102 days after sowing
DAY 102 (9/5) - SEED HARVESTING & BULB

The seeds on my small-pot set of plants are now ready to harvest. Boy, are they delicious! Nice, strong licorice flavor. I love to nibble them. One of our little girls does, too. I need to come up with some recipes to use them in and convert the whole family (there are two fennel non-believers in the bunch). On the other larger plant, the bulb is developing nicely. I've been keeping the soil heaped up around the bulb to protect it from the sun as it develops. I'm thinking this guy is going to go on a homemade pizza. Mmmm....

Fennel seeds ready for harvest 102 days after sowing

Garlic Chives

An Intro to Garlic Chives

Garlic Chives - Harvested Leaves MY STATUS: Grown Successfully to Harvest   

Garlic chives (Allium Tuberosum), also known as Asian garlic or Chinese leeks, are related to onions but have different shaped leaves and grow taller. The plant grows in perennial clumps that slowly spread, producing grassy leaves up to 15 inches tall. Leaves and stalks are used in cooking, particularly in East Asian cuisine.

SUN CITY

Garlic chives like full sun or partial shade.

KEEP THEM MOIST

Though you'll want to keep your garlic chives out of the rain like most plants non-native to Pohnpei, they do like moist soil. They can survive periods of dryness, but they won't produce many leaves if they aren't getting regular water. Watering deeply but infrequently will encourage root growth.

FERTILIZE IT

This plants likes nutrients, so you'll have better results if you fertilize regularly with something mild like fish emulsion.

Flowering Garlic ChivesHARVESTING

Like many herbs, harvesting actually stimulates growth. You can start cutting leaves for use as soon as they are about 4 inches tall. Cut them an inch above the soil.

REMOVE THE BUDS

Snip off any flower buds that develop to keep the plant focused on leaf production and prevent it from going to seed.

What I Did

Ferry-Morse StartSmart Garlic Chives seeds

DAY 1 - SOWING

Chives can be started in a seed tray, but I just didn't see the point in that, since we don't have issues with cool weather here. I had a long, rectangular container that was perfect for them, so I sowed directly into it. I didn't do anything fancy with the soil mix. I just put some gravel on the bottom of the pot and filled the rest up with potting soil. Seeds were sprinkled over the surface and covered with a thin layer of dirt. The pot was then carefully watered. I used Ferry-Morse StartSmart seeds purchased at Home Depot in Southern California. They were kept in the fridge for about 3 months before I got around to sowing.

DAY 8 - GERMINATION

About 11-12 seeds have germinated.

DAY 60 - SLOW GROWTH

With the arrival of the wet season, the sun has been scarce and it has been rainy and humid most days until about 1 week ago. My chives have grown very slowly, but they don't seem unhealthy so I hold out hope. Two months after sowing, however, they are still quite small. I'm going to try cutting leaves to see if that stimulates growth the way it has with basil and some of the other herbs.

Garlic Chives 60 days after sowing

DAY 87 - PARTIAL SHADE WORKS BETTER THAN FULL SUN

These damn plants have developed at a snail's pace, and I'm now convinced it was because they were getting too much hot, direct sun. I moved them into the shade of another plant about a week ago, and things have picked up dramatically. Also, I cut all the plants down to an inch above the soil. In a couple of days they were thicker and bushier and as tall as before. Cutting certainly stimulates growth. They have nice, mild onion flavor when chewed. I had some on my baked potato last night. :)

DAY 126 (9/5) - GOOD GROWTH, FINALLY

After all this time, finally, the chives look good. They are filling out the container and growing nicely. A little shade has helped. Cutting them also results in lots of new growth. The flavor is excellent! Very garlicy. Great on baked potatoes.

Garlic chives 126 days after sowing

Tuesday, April 2, 2013

Peppermint

An Intro to Peppermint

Peppermint
MY STATUS: Grown Successfully to Harvest from Plant Sections 

Peppermint is a hybrid of two species in the mint family of herbs. Like spearmint, it's a perennial and can grow to heights of a couple of feet, though often it just stays low and spreads along the ground. The leaves of the plant are used in similar ways as spearmint. All of the growing conditions of the plant are the same, as well. For detailed information, visit the page on spearmint.

What I Did

DAY 1 - PLANTED SECTIONS OF A MATURE PLANT

Section of mature peppermint plant on the day of transplantationBecause peppermint is a hybrid, any seeds it produces are often not reliable for propagating more peppermint. If you can get seeds to grow at all, the plants may not be what you expected them to be. So, propagating from cuttings or sections of a mature plant is only good way. I knew a friend on Pohnpei with some well established peppermint and was able to pull up a small section of stems and roots. I planted this in a small, shallow pot with gravel on the bottom and regular potting soil.

DAY 54

Peppermint plant 54 days after propagation by sectioning
I keep the peppermint up in my garden shelter on the roof where it's well away from the spearmint down on our porch (if grown close together, the plants will cross-pollinate). The garden shelter was designed to get full sun, which mint doesn't need all the time, so I move the container around inside the shelter, shading it when necessary with other plants. Like the spearmint, I've sped up the process of filling the container by taking cuttings from the existing plant and sticking them in empty parts of the pot. In a few days, they put down roots and begin to spread. The peppermint hasn't grown quite as quickly as the spearmint started at the same time, but it has done fine. I may switch the locations of the two varieties of mint and see if this one has just been slowed by too much sun. (above).

DAY 99 - GROWTH SPURT

This plant has really filled out over the last month. It's been brutally hot, so I've kept in the shade of other plants and watered liberally. The funny thing about it is that it likes to grow out rather than fill in the area it has. The plants have grown out along the concrete in every direction. You can see why they say to keep this plant contained. It's a tireless traveler.

Peppermint plant 99 days after propagation by plant sectioning

DAY 209 (12/20) - INDOORS

Growth was significantly hampered by the blistering weather of the early fall this year. The container is so small that it dries out super fast and needed to be watered several times a day. I couldn't keep up and the plant started to look sick. The final straw was when I was gone for a couple of days and it got too much sun and no water. I thought the plant was a goner, but I brought it inside and have kept it here ever since. It's doing great now and recovering quickly. I clipped back all the dried out parts and new shoots are coming up all over the place. It will certainly make a full recovery. When it's back to 100%, I'll transplant it to a larger container (I recently transplanted the spearmint and oregano plants and they have simply exploded with growth). The lesson is that peppermint doesn't need to be in Pohnpei's direct sun. It seems to be very happy and exhibit the most growth in the shade or even indoors next to a window.

Bouquet Dill

An Intro to Dill

Dill leavesMY STATUS: Grown Successfully to Harvest 

Dill is a member of the carrot family, native to the Mid-East. It's an annual in temperate climates, but may have quite a long life-span in Pohnpei's invariably warm climate.

WELL-DRAINED, SIMPLE SOILS

Like many herbs, dill does well in loose, well-drained soils with low fertility. It doesn't need to be fertilized much, if ever, and over-fertilizing can actually weaken the flavor.

CONTAINER-HAPPY / DIRECT SEED

Dill isn't adversely affected by crowding. It does well in containers, but it has a fairly substantial tap-root, so the pots need to be deep. Plants will support each others' rather flimsy stalks if grown close together. It can grow as tall as 4 feet. Like cilantro, it doesn't like to be transplanted, so it should be sowed in its final resting place.

WATERING HABITS

Keep dill out of the rain. Water it as you would other Mediterranean herbs--deeply, but let the soil go completely dry to a depth of at least 4 inches before watering again.

FULL SUN

Dill prefers full sun, but will tolerate partial shade.

PINCH, PINCH

Regularly pinch off the top buds of the plants. This will make them bushier rather than tall and leggy.
Flowering Dill
PESTS BE GONE


Dill is not very prone to pests or diseases. The main enemy of the plant--caterpillars of the swallowtail butterfly--don't live on Pohnpei.

HARVESTING

The plant is grown both for its leaves and for its seeds. Leaves can usually be harvested within a month and seeds after two months.

CROSS-POLLINATION ALERT

Dill will cross-pollinate with other plants from the same family, like fennel and coriander (cilantro), ruining its taste (and that of the other plant involved), so keep it well away from your cilantro and fennel.

What I Did

DAY 1 - SOWING

Ferry-Morse Bouquet Dill seedsHonestly, I've never used dill in cooking before and I wouldn't know how to use it, but I seriously want to try making my own pickles here on Pohnpei. Not sure where I'll find cucumbers small enough. Perhaps I'll be making some giant pickles. Anyway, that's my motivation for this plant: a big jar of juicy, sour pickle-goodness. :)

It is widely recommended that dill be sown directly in the ground or in the container where you plan to grow it, rather than in seed trays or cups. I prepared a medium pot with some gravel in the bottom and a moist mixture of 90% potting soil and 10% fine basalt sand. Seeds were sown in 1/4 inch deep holes a few inches apart. I used Ferry-Morse StartSmart seeds purchased at Home Depot in Southern California. Seeds were refrigerated for 3 months prior to sowing.

DAY 6 - GERMINATION

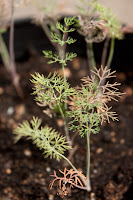
Dill seedlings 4 days after germination
A number of the seeds have sprouted. They look very similar to cilantro seedlings.

DAY 16 - TRUE LEAVES

I thinned out the seedlings so they are all at least an inch or so from each other. I'll be attempting to transplant them fairly soon, even though transplantation isn't the best way to do things. At the time I seeded, I just didn't have the right containers. We'll see if I can make it work. All seedlings are now about 2 inches tall and have at least one true leaf (some have two). The leaves look very similar to the ones developing on the fennel, which I keep quite some distance from where the dill is.

10-day-old dill seedlings

DAY 22 - TRANSPLANTATION

As I pointed out earlier, you shouldn't actually be doing the whole transplantation bit, but I was lazy and didn't get the pots I truly needed right at the start. So I did the transplant this afternoon. I used a big spoon and dug it down really deep, taking a huge chunk of soil with one seedling in it to avoid disturbing the roots any more than necessary. The big chunks were planted right in the soil in the new pots. We'll see if they pull through. If not, I'll do what everyone on earth suggested and re-sow.

DAY 36

Despite what everyone said would happen, the dill tolerated the transplantation well and is thriving.

Dill seedlings 36 days after sowing

DAY 73 - SLOW GROWTH

73-day-old dill
After a strong start, the dill is still looking pretty much the same as my last entry more than a month ago. It hasn't gained any height or thickened much. It continues to produce new leaves, but these usually turn purplish and then brown within a week or so. My guess is that I've over-watered somewhat, so my current tactic is to let the pot dry out more and see if this has a positive effect. It was my understanding that dill and fennel thrive in similar conditions, but if this is true, something else is wrong; my fennel is grown in a different spot, but has gotten just as much sun and water as the dill and it is growing like a weed. It's possible that slight differences in soil composition could be the cause. We'll see if drier soil helps.

DAY 80 - TERMINATION

These guys weren't doing anything other than turning reddish and wilting. More water, less water, more sun, less sun. Nothing seemed to help.

ATTEMPT 3 / DAY 1 (12/23) - SOWING

Since I'm leaving Pohnpei in a couple of months, I decided to make one last try with the dill. This is my third attempt to get this plant to thrive. Seeds germinated quickly on the first two runs, but the plants never really achieved any size. They stayed in the seedling stage before finally withering. This time I'm going to try giving the plants more shade.

Rosemary

An Intro to Rosemary

Rosemary cuttings MY STATUS: Grown Successfully to Harvest

Rosemary is a woody perennial herb related to mint that produces a pungent aroma and is widely used both as a seasoning and as an ornamental shrub.

ULTRA DRY

Rosemary's needle-like leaves hint at the type of environment to which it is adapted. It is native to the Mediterranean, grows excellently in nutrient-poor, bone-dry desert soils, and can survive lengthy periods of drought. The point being--it doesn't need much water and will drown pretty quick if exposed to the elements on Pohnpei. You should only water once a week or less. Rosemary does fine in containers, though, and that's exactly how you should do it here. This way you can keep it completely out of the rain and still get it the most sunlight possible.

SUN x 10

Perhaps even more than the other Mediterranean herbs, rosemary worships the sun. It can take pretty much any type of sun this planet has to offer, so you won't need to worry about it getting too much on Pohnpei. At the same time, lack of constant bright sun won't kill it; it will just grow slower.

Rosemary plants

QUICK-DRAINING, SANDY SOIL

Rosemary neither needs nor likes rich soil full of organics. And as we've already mentioned, it likes it dry. Rather than planting your rosemary in a typical potting soil-compost mix, use 70% soil and 30% sand. The sand will heat up quicker than soil and keep the plant nice and toasty. It will also keep the soil from retaining water.

SLLLLLLOOOOOW . . .

Speaking of slow . . . rosemary is a notoriously slow-growing plant. It can take as long as three years to reach maturity from seed. Once it gets there, though, it can go crazy. About ten years ago, my parents planted some rosemary on a steep, rocky slope behind their house in Southern California. The entire lower part of the slope is now covered with a wild 4-5 foot wall of dense, impassable shrubs! My dad massacres them with a hedge trimmer a couple times a year and it all just gets bigger, woodier, and more frightening.

But coming back to the typically slow growth, at least at the beginning. Three years is a pretty long-term commitment for most of us. Read on for other options for adding this plant to your garden without waiting forever.

SAD SEEDS / HAPPY CUTTINGS

Rosemary seeds have a very low rate of germination. You have to sow a lot of seeds, and most of them won't do anything. If you're fortunate enough to get something to sprout, you'll then have to wait years for the plant to develop to the point where it can be used for anything. This is why hardly anyone grows rosemary from seed if they can avoid it. Luckily, rosemary propagates very easily from cuttings. Simply cut a nice-sized branch from someone's existing plant, dip the cut end in rooting hormone, strip all the leaves off the lower 2-3 inches, and plant. The cutting will put down roots in a couple of weeks and voila!--you will be the proud owner of a new rosemary clone!

FORGET PESTS

Rosemary isn't known for its susceptibility to pests. You probably won't need to worry about this.

What I Did

Rosemary plant propagated from a cutting
What I did is simple.

I CHEATED.

Yes, I admit it.

First, I attempted to germinate some seeds the same way I did with everything else. I used a whole package of seeds and only two germinated. Two darn seeds. But then they just remained tiny little nubs above the soil for weeks and never got large enough to even transplant. When I realized that I would have to wait 2-3 years for a real plant, even if my seedlings survived, I ditched those little bastards and found a friend who already had a lot of mature rosemary growing in pots.

My friend had recently propagated a new plant from a cutting, so he just gave that to me. Problem solved. I certainly can't claim to have grown the rosemary myself or to have any special skills related to rosemary-cultivation. But the whole point of this blog is to show that it is possible to grow these plants on Pohnpei, and my friend pretty much proved that already. Now that people have mature rosemary plants on Pohnpei, there's really no reason to bother with seeds. Get to know some people who have what you want and beg a cutting off them.

DAY 1 - TRANSPLANTATION

I did actually replant the rosemary plant I acquired from the friend mentioned above. I replanted it in a slightly larger pot than it was originally and used 30% fine black sand and 70% potting soil.

DAY 2-18


I move my rosemary around and give it the most sun it can get here. I water it every 7-10 days, depending on how sunny and hot it has been. It looks great.

DAY 19 - TOPPING

I felt that the plant had been in the pot long enough to be well-established after the transplant. Since it was originally a single stalk about 8 inches tall, I snipped off the top 1/3 of the plant. This will encourage new sprigs to come up from the base of the plant and branches to form on the main stalk.

New branches developing on rosemary plant
DAY 29

Since I topped the plant, a whole bunch of needles have lengthened out (left) and will eventually become new branches. Right on!

Can't think of much else to do with this self-maintaining plant. Maybe I should play Edison Lighthouse's "Love Grows Where My Rosemary Goes" and Simon & Garfunkel's "Scarborough Fair" to it? :)

DAY 65 - UNINVITED GUEST

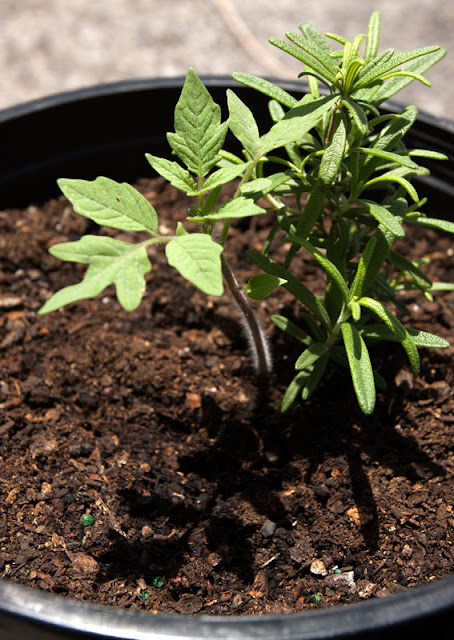
The rosemary has certainly been the most low maintenance of all the plants I have. I water it deeply about once a week and sometimes less if we have a stretch of cloudy days. The single stalk has branched out all over the place, and the bottom shoot is almost half as tall now. But the most surprising thing has been the tomato seedling (below) that sprouted right next to the rosemary plant and is now almost 3 inches tall. I'm not sure where it came from. I haven't planted any tomatoes in a long time and I definitely didn't drop a seed in this container intentionally. And yet, there it is. I'll probably pull it out in another week and replant it. I'm not even sure what type it is, since I currently have three varieties of tomatoes and the seedlings all look identical.

Tomato seedling growing in rosemary pot

DAY 71

I can't actually believe it. A SECOND tomato seedling sprung up yesterday in the rosemary pot! I have no clue where these guys are coming from. I removed the first one yesterday and will replant it tomorrow. The rosemary is really thriving in its new position on the roof under a clear plastic shelter. New leaves are sprouting everywhere, the side shoot is almost as tall as the original, and the main stem has several new branches.

DAY 85

The rosemary has expanded to the point where it's almost big enough for me to take a branch and start a second plant.

Rosemary plant 85 days after transplantation

DAY 181 (9/5) - FILLED OUT

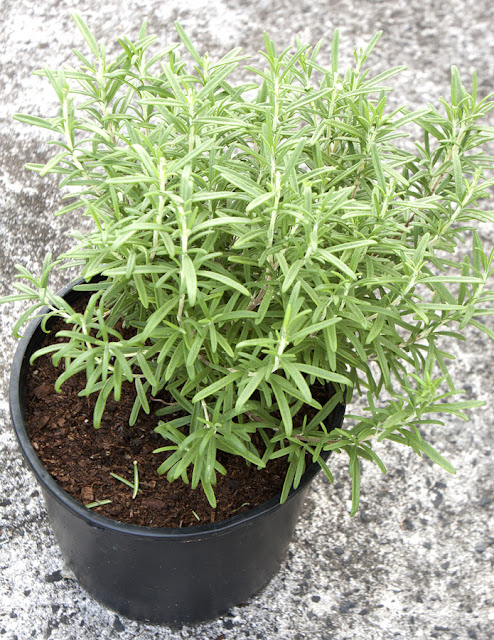
Over the summer, which has been exceptionally dry and hot for Pohnpei, my rosemary plant has completely filled. I've continually snipped off the top of all the main branches, causing plant growth to go into producing more branches. And that's really all I've done. I hardly water it and I never fertilize or do anything else. It just grows and grows on its own. My kind of plant!

Rosemary plant 181 days after propagation

Oregano

An Intro to Oregano

MY STATUS: Grown Successfully to Harvest from Cutting

Oregano is a perennial herb native to western and southwestern Europe and Asia and belonging to the mint family. There are many different varieties, some of which can grow as tall as two feet, but most often the plant spreads out and stays low to the ground. The more common cultivars typically have small leaves that can be even more aromatic when dried than when fresh. Like mint, the plant will send out runners and re-propagate itself as long as it has room to expand. Along with basil, oregano is used heavily in Italian cuisine, particularly in the New World.

SEEDS OR CUTTINGS

Oregano can be propagated with seeds or by cuttings from the plant. The latter is faster and easier.

ONCE AGAIN, SUNNY & DRY

Like most of the common herbs, oregano thrives in full sun. It also does not like to be wet. Keep it out of Pohnpei's heavy rains. Water sparingly.


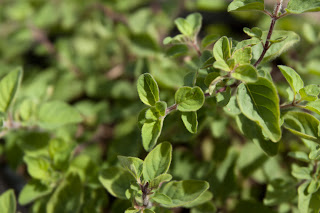
4-month-old oregano grown from a cutting
MEDIUM TO POOR SOIL IS FINE
Oregano doesn't need fertile soil. In fact, the flavor will be better if the soil has few nutrients. Use 70% plain garden soil and 30% sand. It does best when the soil pH is just a bit on the alkaline side. It does fine in pots, but the ground will work, too, if your spot is relatively protected from Pohnpei's rain. It does spread, however. It should not be planted in a container with other herbs, as it can sometimes smother them.

TOMATO COMPANION?

Many people claim that planting oregano around your tomato plants improves their flavor and makes them less susceptible to whiteflies and other pests. I haven't tested this theory yet, but it is fact that the oils produced by the plant have anti-viral, anti-fungal, anti-parasitic, and anti-bacterial properties.

CROSS-POLLINATION ALERT

If you are growing multiple varieties of oregano in close proximity, they can cross-pollinate and result in strange hybrids.

What I Did

DAY 1 - SEEDING

I purchased Ferry-Morse seeds from Home Depot in California in early winter and sowed them in paper egg cups on Pohnpei about a week later. Nothing fancy. I sprinkled the seeds on the soil in several cups and spread some more soil over them. Everything was kept moist, but not wet--as always. I put the cups in full sun whenever possible and kept them indoors overnight.


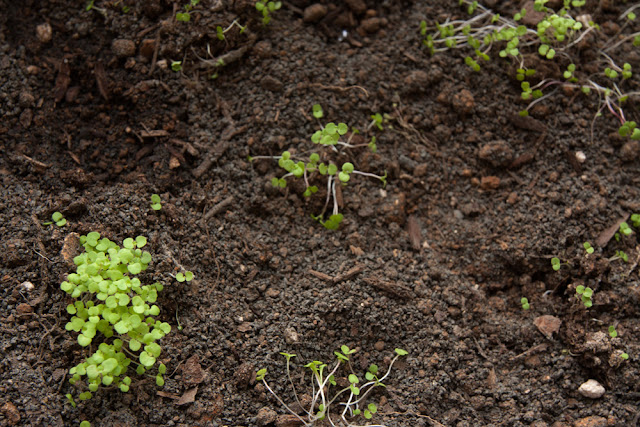
Oregano seedlings two days after germination
DAY 4 - GERMINATION

Sprouts began to poke up early in the morning. There are a lot, but they're small.

DAYS 5-14

Nothing much happening. At least, nothing good. The seedlings grew to a height of about a quarter inch and then stopped. If I put them in the sun, they wilt and shrivel up. If I water them, they wilt and shrivel up. If I refrain from watering, they wilt and shrivel up. It's looking like they might not make it.

DAY 15 - A LAST ATTEMPT TO SAVE THE LITTLE GUYS

My seedlings continue to languish with no growth in more than a week. Other people have told me they've had problems like this with oregano on Pohnpei. Could it be there isn't enough sun? They look more or less as they did when they first germinated--but droopy. Even though they aren't big enough to normally qualify for transplantation, desperation has set in and I think I'll plant them. Maybe more room and new soil will revive them.  Since everything looks fragile, I'll cut the egg cups right out of the carton and plant them in my pot without pricking out any seedlings.

Dying oregano seedlings the day after transplanting

 DAY 17 - DEAD

The little oregano seedlings, which looked like they might recover yesterday, are now pretty much dead. Not sure what happened. :(

ROUND 2 . . .

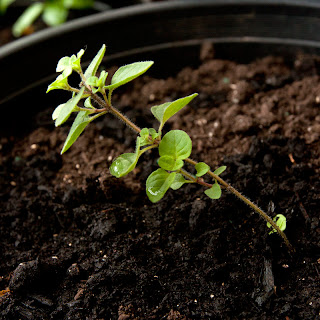
A recently-planted cutting from an oregano plant
DAY 1 - PLANTING

Short-cut. I found a friend who had a ton of oregano that had been growing for years and was very well established. We took a cutting, dipped the cut end in rooting hormone, and planted it in a medium-sized pot with a 70% garden soil and 30% sand mixture. It will be faster this way anyways.

DAY 18 - TOPPING

Oregano plant from cutting 28 days after planting
My oregano cutting seems well established now and has put out several small sets of leaves close to the stem. Since my cutting was quite long, I chopped it off a third of the way from the top. Shortening up the main stem will force the plant to devote more energy to its secondary branches and leaves.

DAY 28

Since topping the plant, I've seen an explosion of new growth. Secondary branches have developed where leaves were previously. There's also a major branch forming right at the soil level. The leaves are green and healthy-looking. Yippee!

DAY 42

It's really kind of amazing how quickly this little piece of plant has turned into something bushy.  My strategy has been to let a branch develop until there are two pairs of leaves and then snip the top, eliminating that branch's potential to lengthen and prompting the main stem to put out more new branches. So far it's working pretty fantastically. It doesn't look anything like it did a month ago. This is absolutely the way to propagate oregano on Pohnpei! Why agonize over fragile seedlings when you can have a mature plant from a cutting in a little over a month?

Oh, and yes: so far it seems true that whiteflies are not down with the oregano. They definitely enjoy sucking on tomatoes, sweet basil, and sweet peppers (don't we all?), but I never, never find them on the oregano. But would growing oregano around a tomato plant really repel whiteflies? I have my doubts, but maybe I'll experiment.

Oregano plant 42 days after propagation by cutting

DAY 63

The oregano growth is pretty much off the charts. It has essentially doubled in size and the number of leaves in the last 20 days.

Oregano 63 days after propagation by cutting

DAY 83

Yep, that's the same plant that started out as a scrawny 4-inch long branch!  Since this one has expanded so quickly, I figured I might as well start some more. I took three cuttings and planted them in a large, shallow container. This time, as an experiment, I used no rooting hormone on the cuttings. I want to see if it's really essential to successful propagation.

Oregano plant 83 days after being propogated by cutting

DAY 136

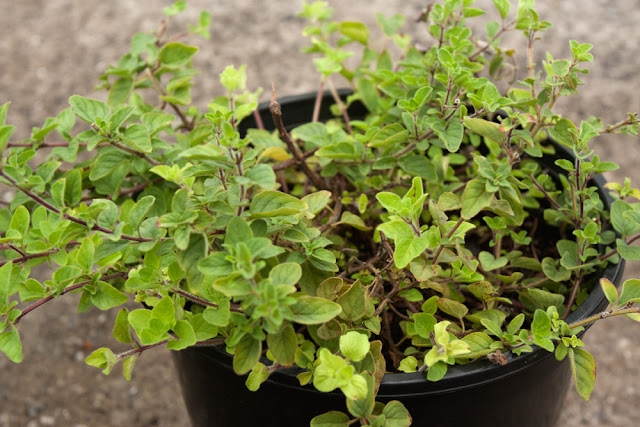
I don't know that there's much more I can say about this plant. Once established, it has become very hardy, requires little attention, and grows at a rapid rate. It can handle water, but on the other hand, it does fine if it doesn't get any for a long time. Here's what it looks like 53 days after the last photo (below).

136-day-old oregano plant propagated from a cutting

DAY 276 (12/12)  - TRANSPLANTATION

My oregano has done great every since it was established and no weather conditions seem to adversely affect it. It tolerated the unusual heat of the summer and fall and seems to be able to handle cool, wet, cloudy weather just as well. The container, however, was getting a little crowded, so I transplanted into a larger one, giving it about 3 times the room. It was amazing to see how huge the root structure was. It really was pot-bound. Since transplantation, it has had a huge revival of growth. The new container is getting full already just a couple of weeks after transplant.

Spearmint

Spearmint Leaves

An Intro to Spearmint

MY STATUS: Grown Successfully to Harvest from Plant Sections

Spearmint is one variety in the mint family of herbs, which also includes peppermint. It's a perennial and can grow as tall as 3 feet, though often it just stays low and spreads along the ground. The arrow-shaped leaves of the plant are used to flavor tea, sweets, and jelly, and can also add something to soups and salads.

PROPAGATION

People usually propagate mint from cuttings (at least 6" long) or by dividing clumps, but it is possible to grow it from seed if you're willing to wait. I gave seeds a try first without success.

RICH, LOAMY SOIL + FERTILIZER

Mint likes rich soil with lots of organic material, so this one will require some compost in the mix. You can put a little sand in there, too. You'll also want to fertilize regularly with something mild like fish emulsion. The plant, however, is quite hardy and will tolerate most conditions.

KEEP IT MOIST, NOT WET

Moist soil will keep mint happiest, but it won't thrive if water-logged. It should be protected from Pohnpei's heavy rains.

SpearmintGIVE IT A LITTLE SHADE

Mint can handle full sun, but it prefers partial shade.

CONTAIN IT!

Mint is an aggressive plant. It spreads quickly as long as open ground is available and can over-run other plants. This makes it a perfect candidate for container-growing, which should keep it in check. Keep an eye on it, though--if the branches get long enough and hang far enough outside your pot to make contact with the soil in another pot or the ground, they can put down runners.

HARVESTING

You can start harvesting mint as soon as it has branches a few inches long. Cut branches 1/3 of the way from the ground. Pruning will encourage new growth of leaves and branches.

What I Did

DAY 1 - SOWING

I chose a fairly shallow rectangular container for my mint, threw some gravel in the bottom, and filled the rest with potting soil. Nothing fancy; mint is said to be one of the easiest plants to grow, no matter where you are, though it has a reputation for being very hard to start from seed.  I scattered my tiny seeds across the surface, then covered them with a thin layer of soil. I'll be misting the soil with a spray bottle until the seeds germinate.

DAY 9 - GERMINATION

Tiny seedlings have appeared all over the place.

DAY 31 - PLANTED SECTIONS OF A MATURE PLANT

Spearmint sections 2 days after transplantation
Well, the mint has surprised me--and not in a good way. I really thought it would be a fast-growing plant, but these have acted kind of like the oregano and thyme I tried to grow from seed. Twenty-one days after germination, they still look essentially the same as on the first day--tiny. I've been keeping it in the shade, because I was afraid heat and direct sun would make things worse.

Today I was able to visit a friend, who has well-established mint, and get a few plants. I got some spearmint and one other variety that he wasn't sure about (probably peppermint). Rather than just taking a cutting, he pulled up sections of the plants that had roots, so I'm anticipating they will stabilize pretty quickly. I planted the spearmint in a long, shallow container.

DAY 84

I've kept my spearmint on our porch away from the other type of mint I have to avoid cross-pollination. It gets early morning sun and is in open shade the rest of the time. That seems to be a good combination, because the plant has spread quickly. It is also easy to clone. Every once in a while, I simply snipped off a nice branch, peeled the bottom part, and stuck it in an empty place in my container. In three of four days, the sprig would start putting out new leaves. The container hasn't entirely filled in yet, but it's getting there (see below).

Spearmint plants 53 days after propagation by sectioning

DAY 107

Finally I can say that the spearmint has filled the container. It took just over two months from a small section of a mature plant that was ripped out of a friend's garden. Time for some mint tea. :)

Spearmint 76 days after a small section of a mature plant was planted

DAY 129


Chugging along! I think it would be doing even better if I didn't forget to water it from time to time.

Spearmint 129 days after propagation by plant sectioning

DAY 209 (12/20) - TRANSPLANTATION & NEW GROWTH

This plant was languishing a bit through early fall with the incredible temperatures we were having. The leaves had a yellowish look no matter how wet I kept it. Every part of the porch was getting a lot of direct sun. Finally I decided to transplant the whole thing into a larger container and put it up in the garden shelter, where the plastic sheeting on the roof tends to filter the sun a little. I put the transplanted plant under the shade of the tomato plants. It has exploded! The color has gone bright green again and it is quickly filling in all the extra room.